
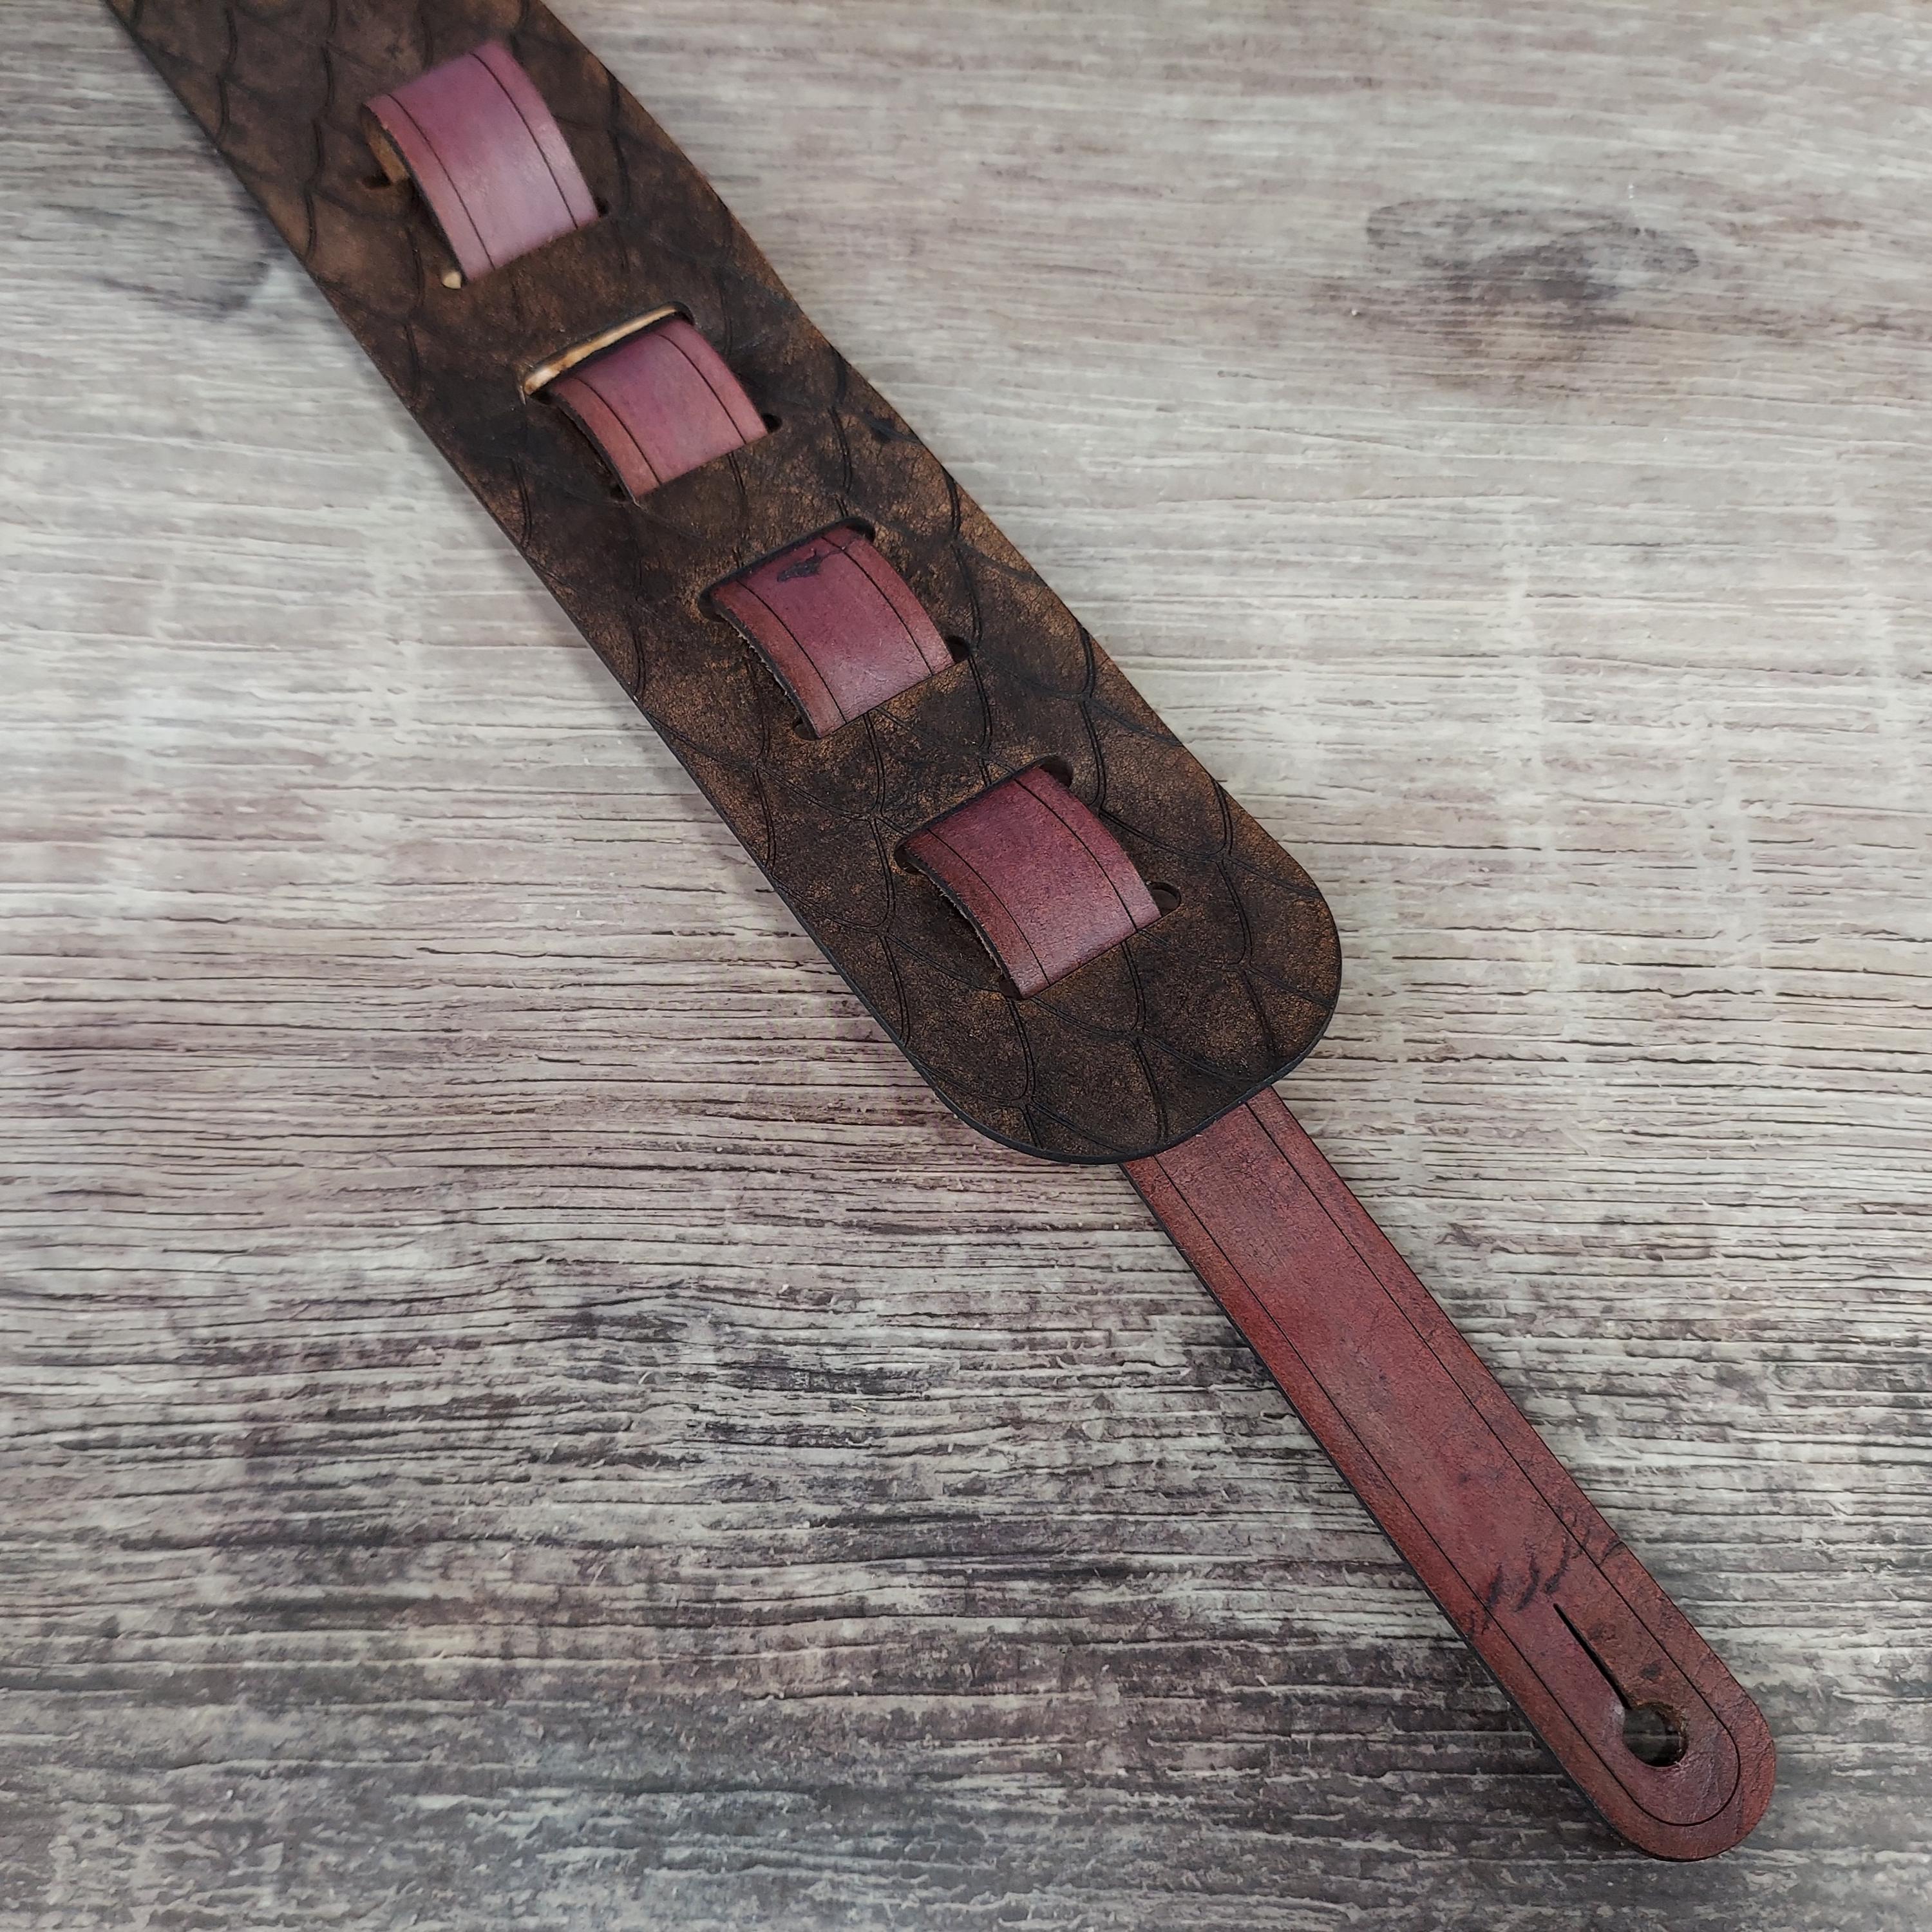
Each one of our handmade leather guitar straps is made from full grain, vegetable-tanned leather and built to last for years of playing.
To help you get started, we’ve put together simple instructions for attaching your strap and adjusting it for the right fit.
Adjusting Your New Guitar Strap
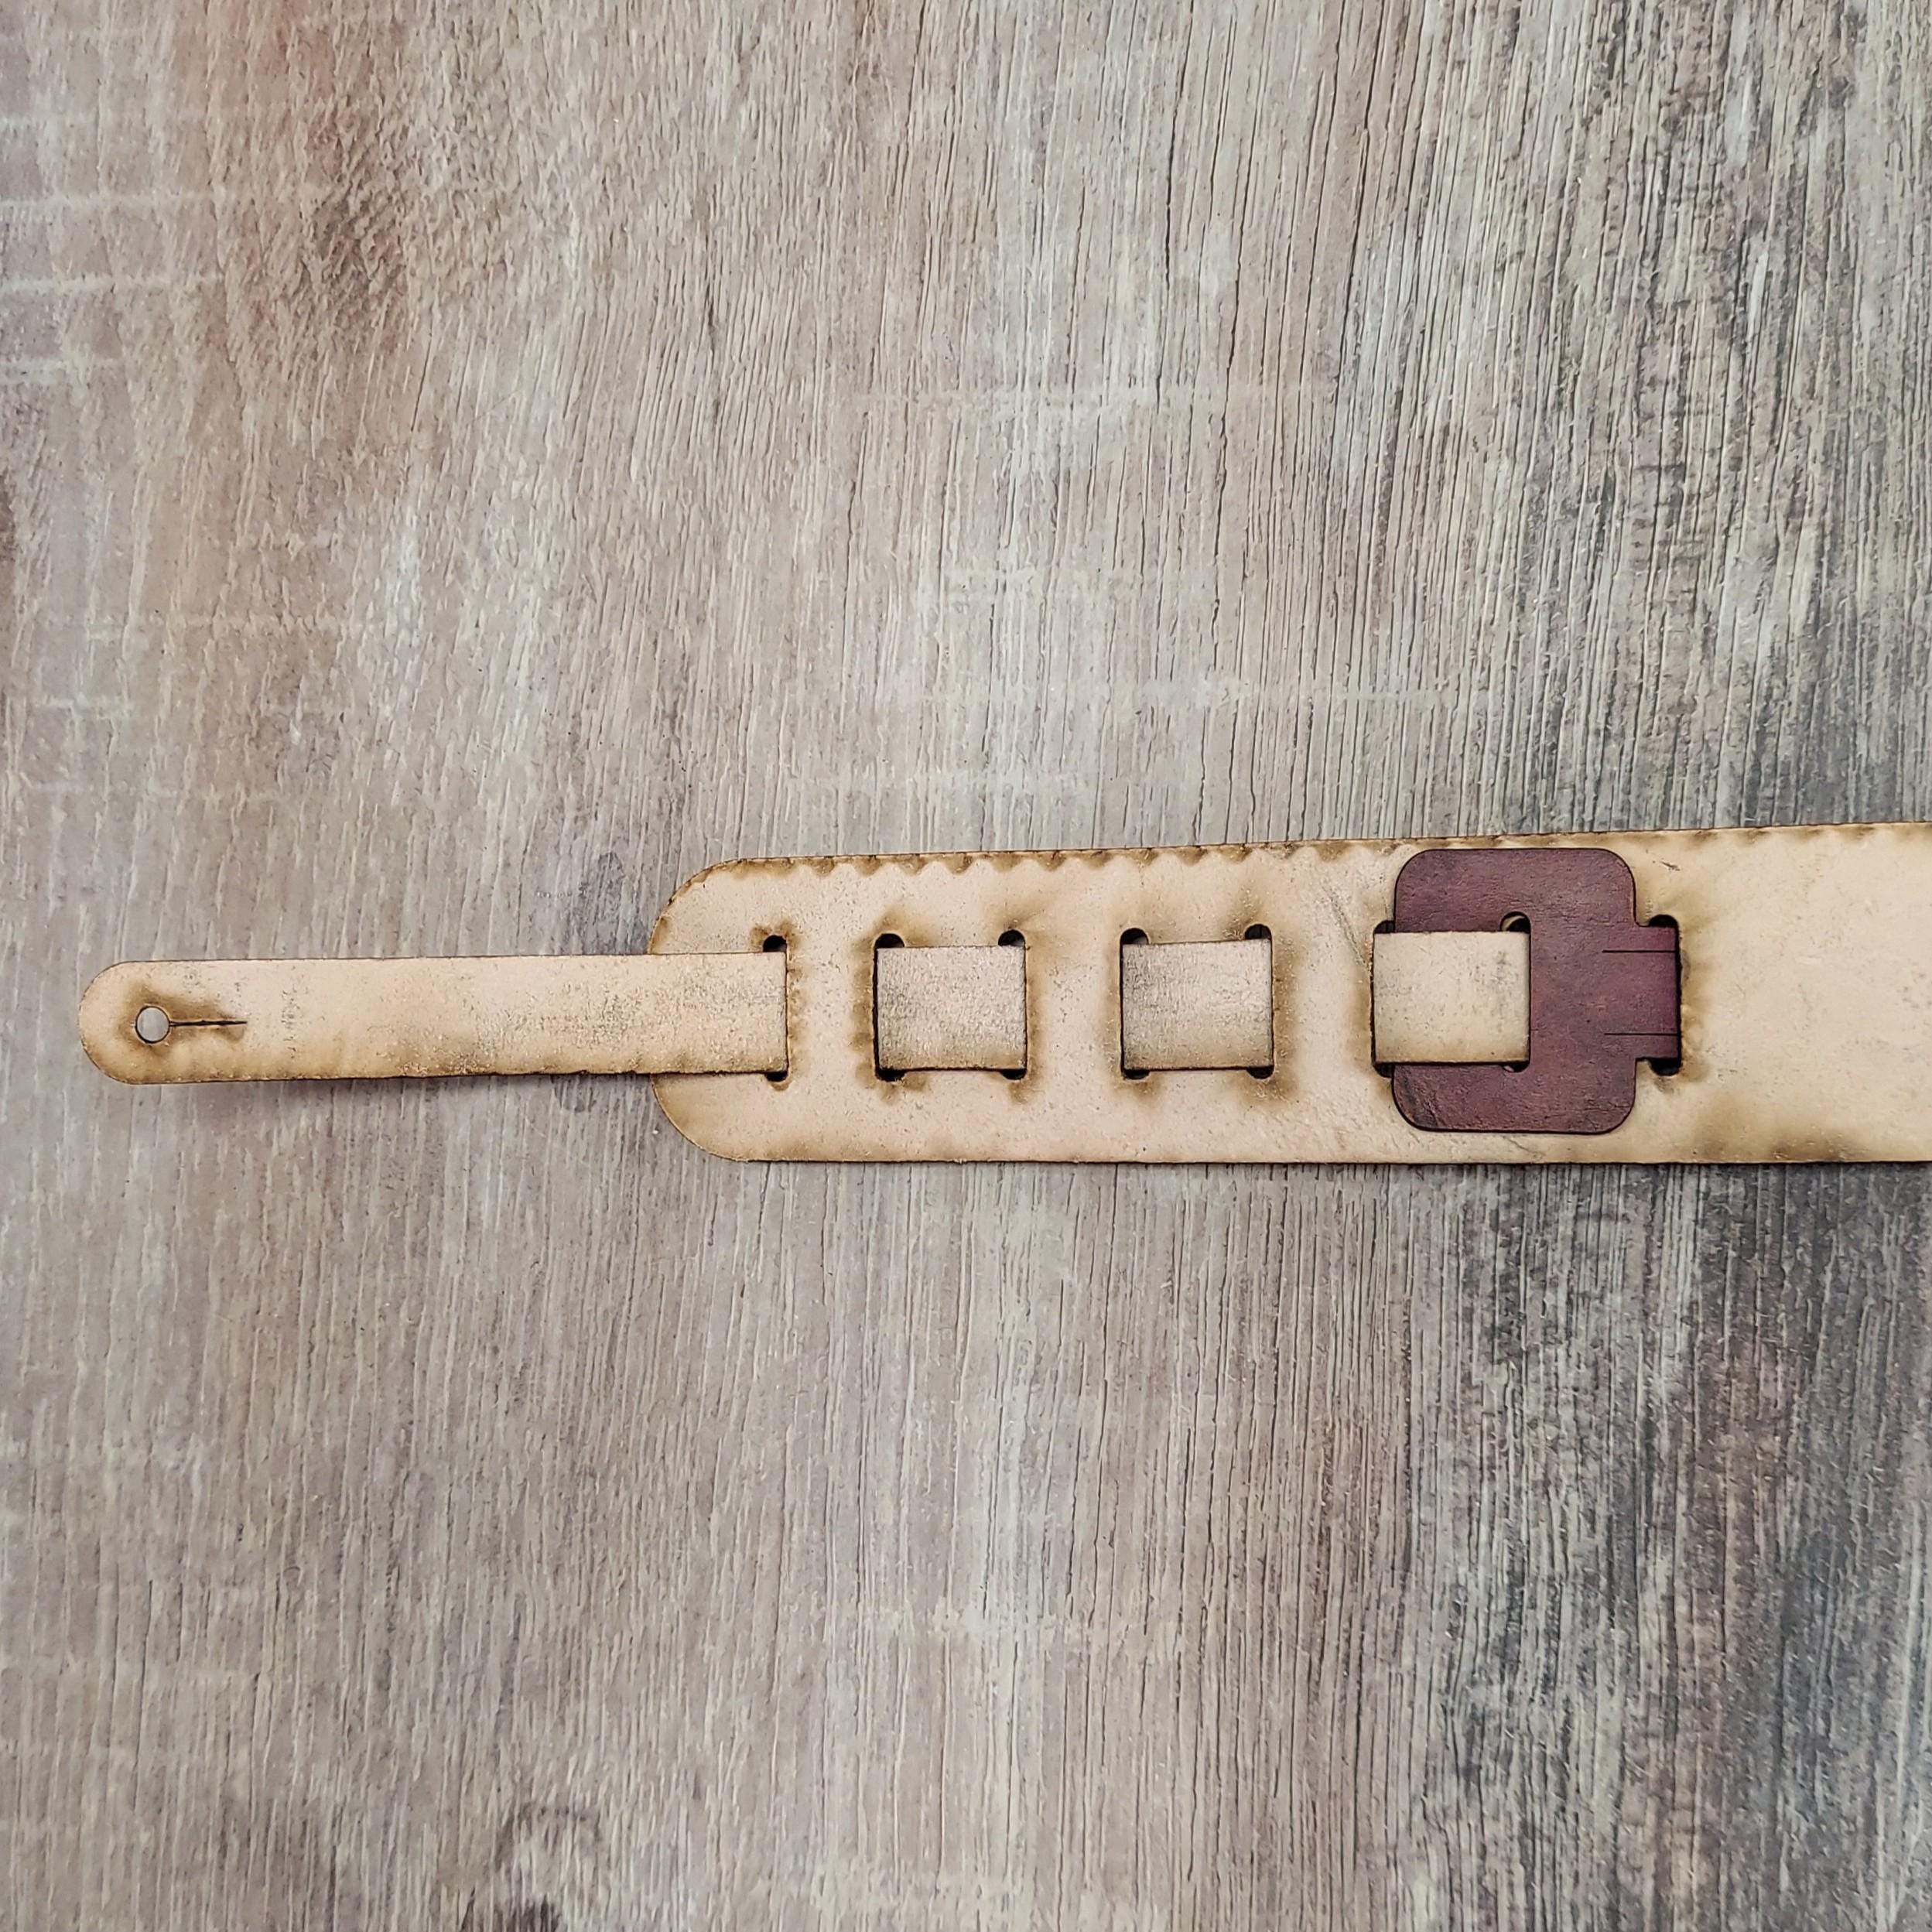
Your strap has been pre-adjusted on one end with the tail piece in the shortest position. This tail piece may be unwoven and then rewoven through any of the other slots to suit your playing position.
If your strap adjusts on both ends, you will need to attach the second tail piece in your preferred position.
1. Place your strap on a flat clean surface, with the finished side down and the unfinished side facing up.
2. Insert the tail piece through your chosen slot, with the finished side facing down.
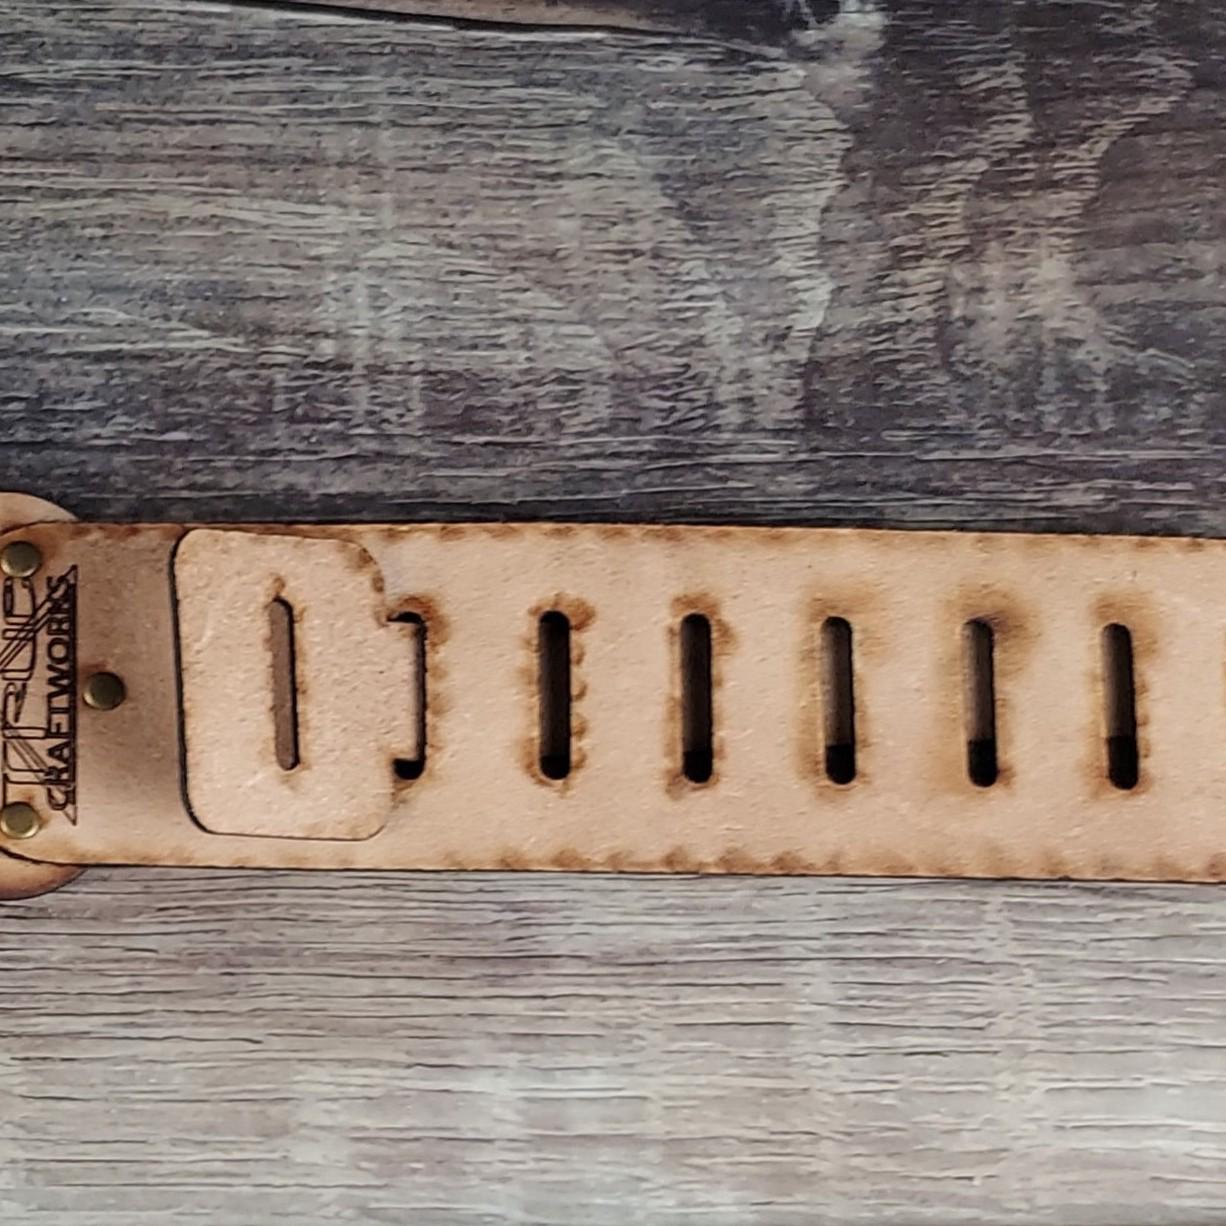
3. Fold the tail piece slot down over the next slot, and insert the tail piece through both the next strap slot and the tail piece slot.
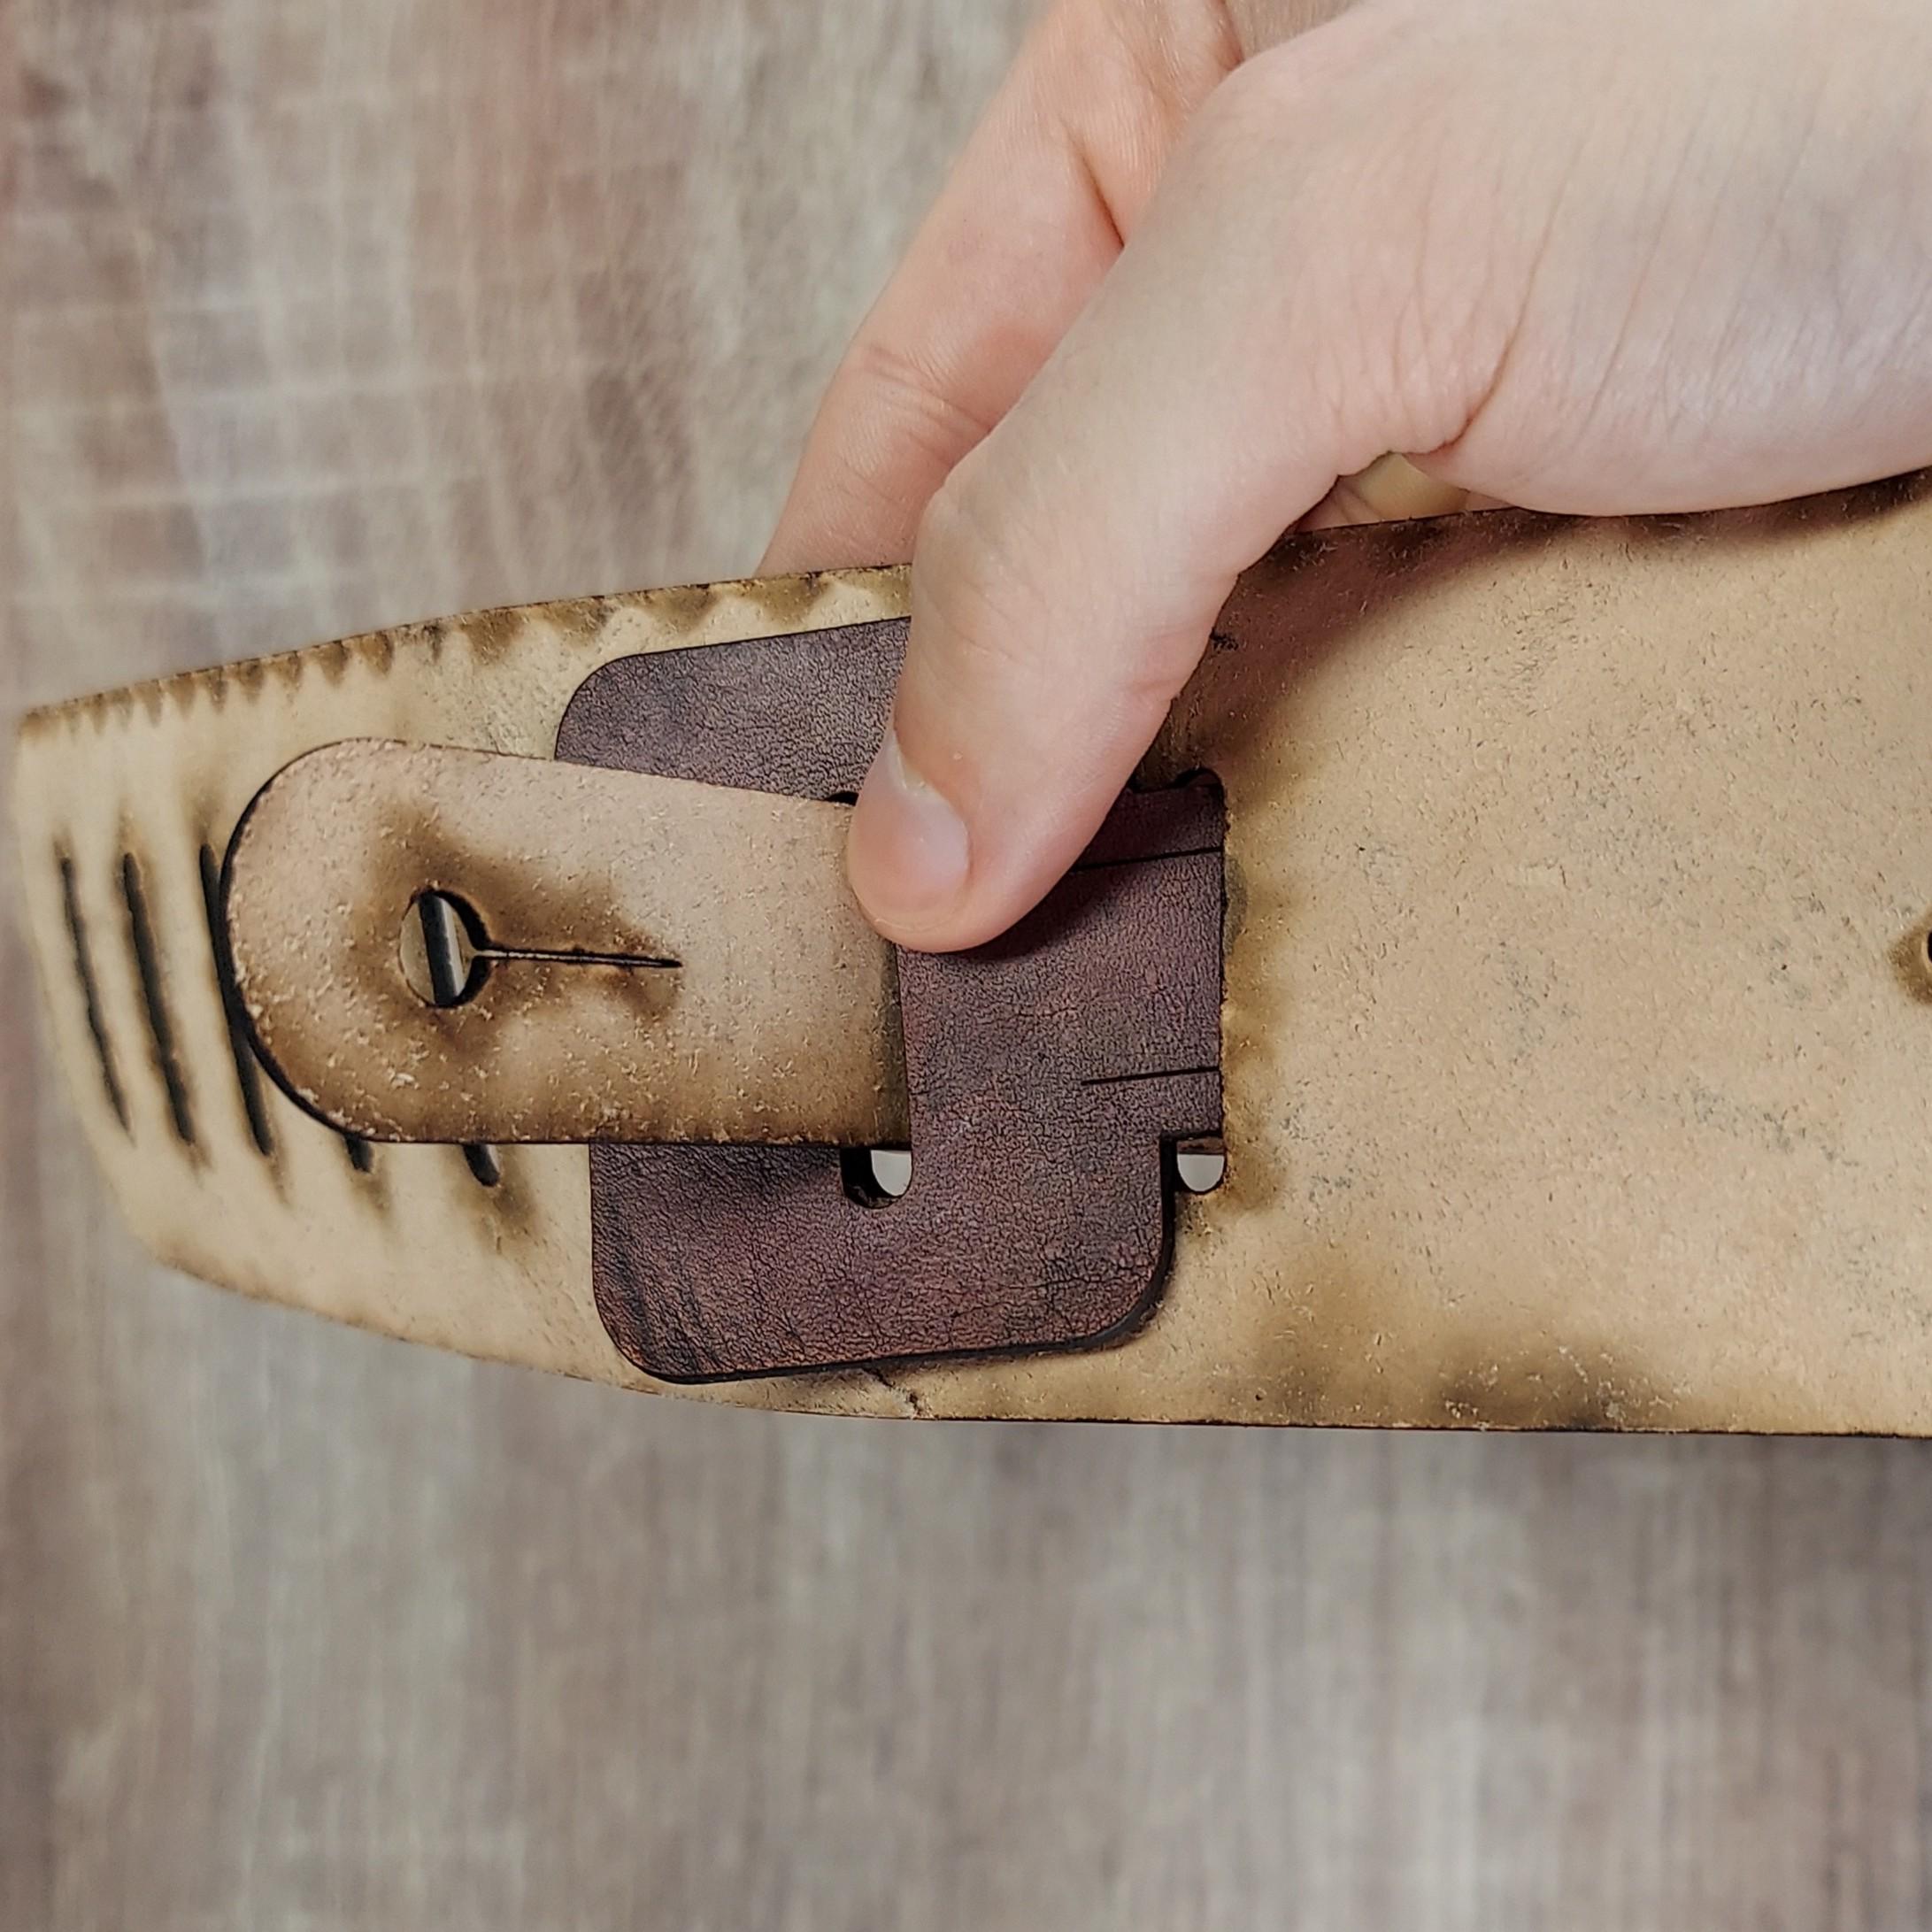
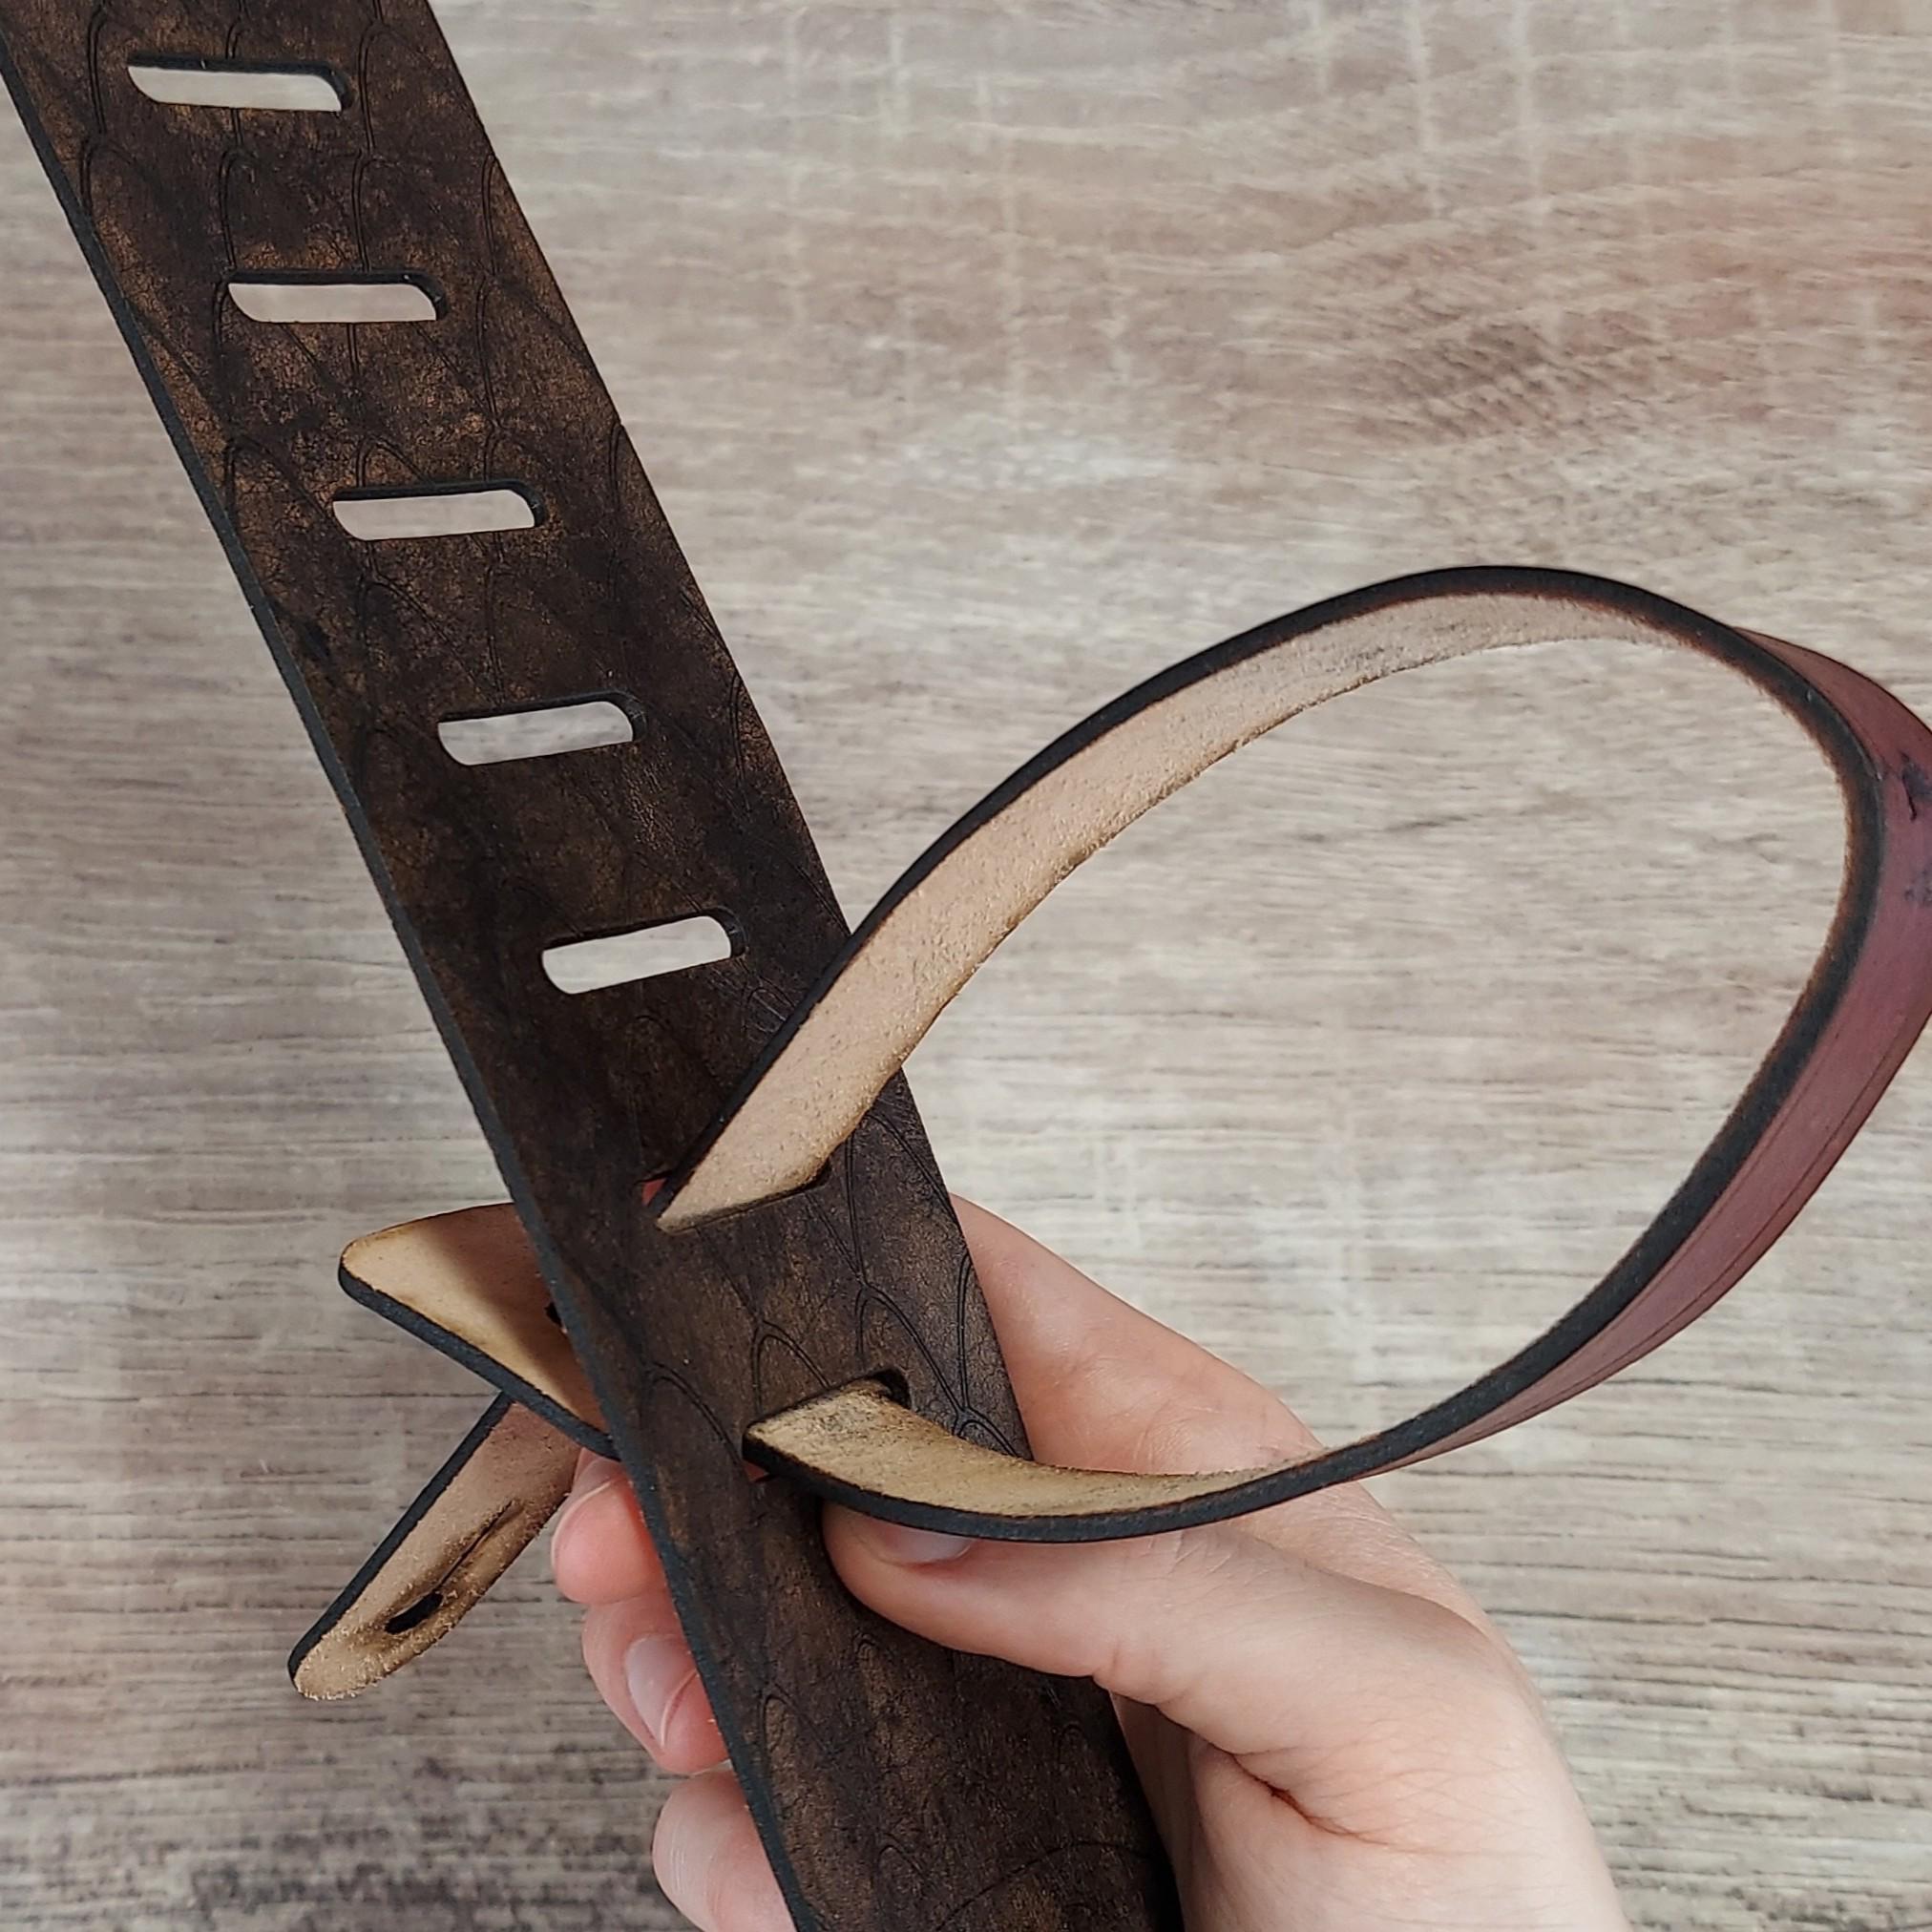
4. Pull the tail piece all the way through this slot and tighten.
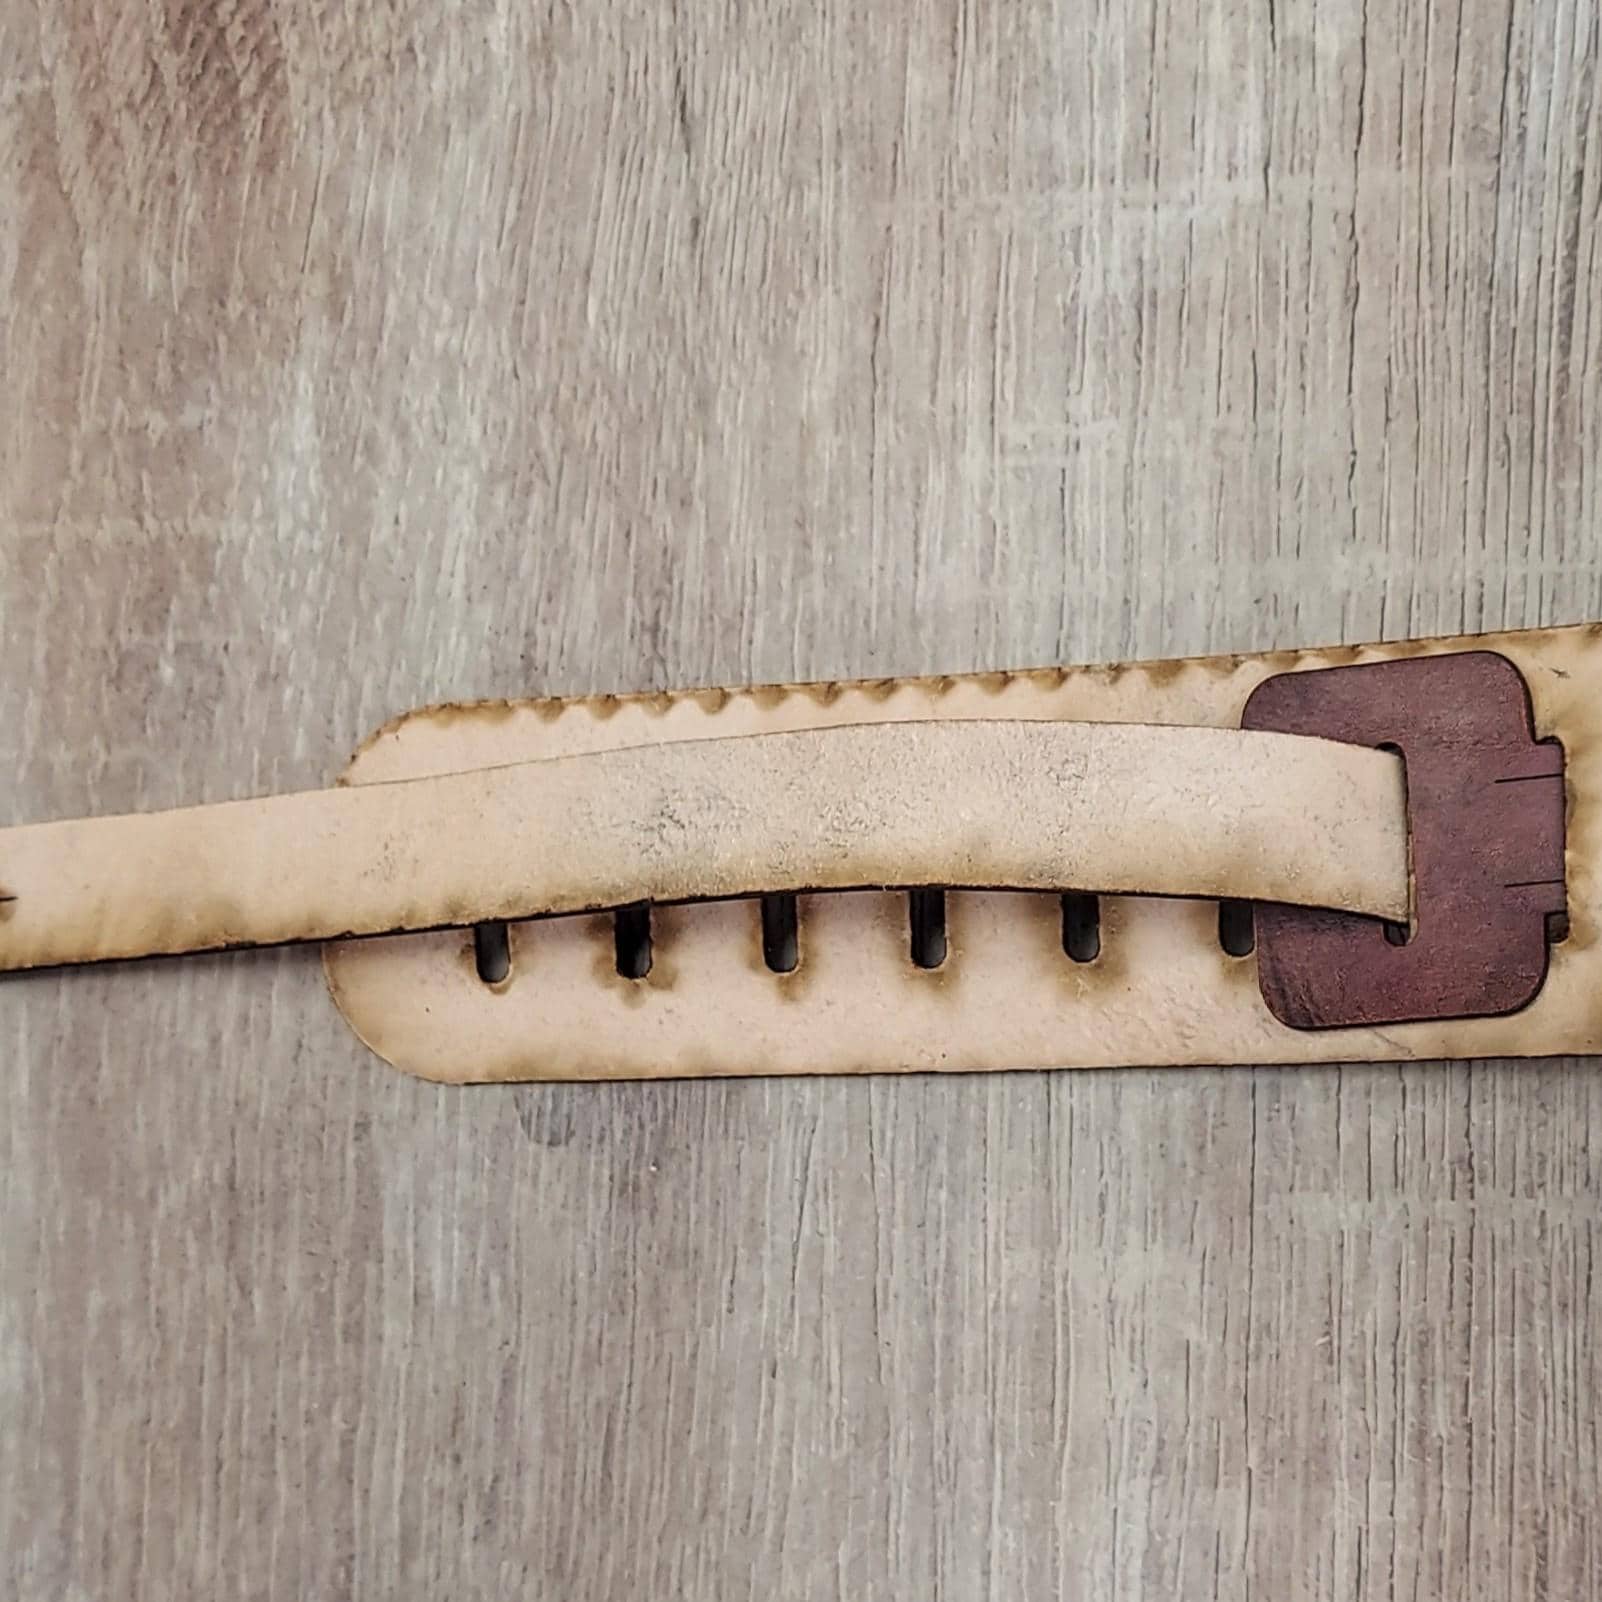
5. Continue weaving through the remaining slots.


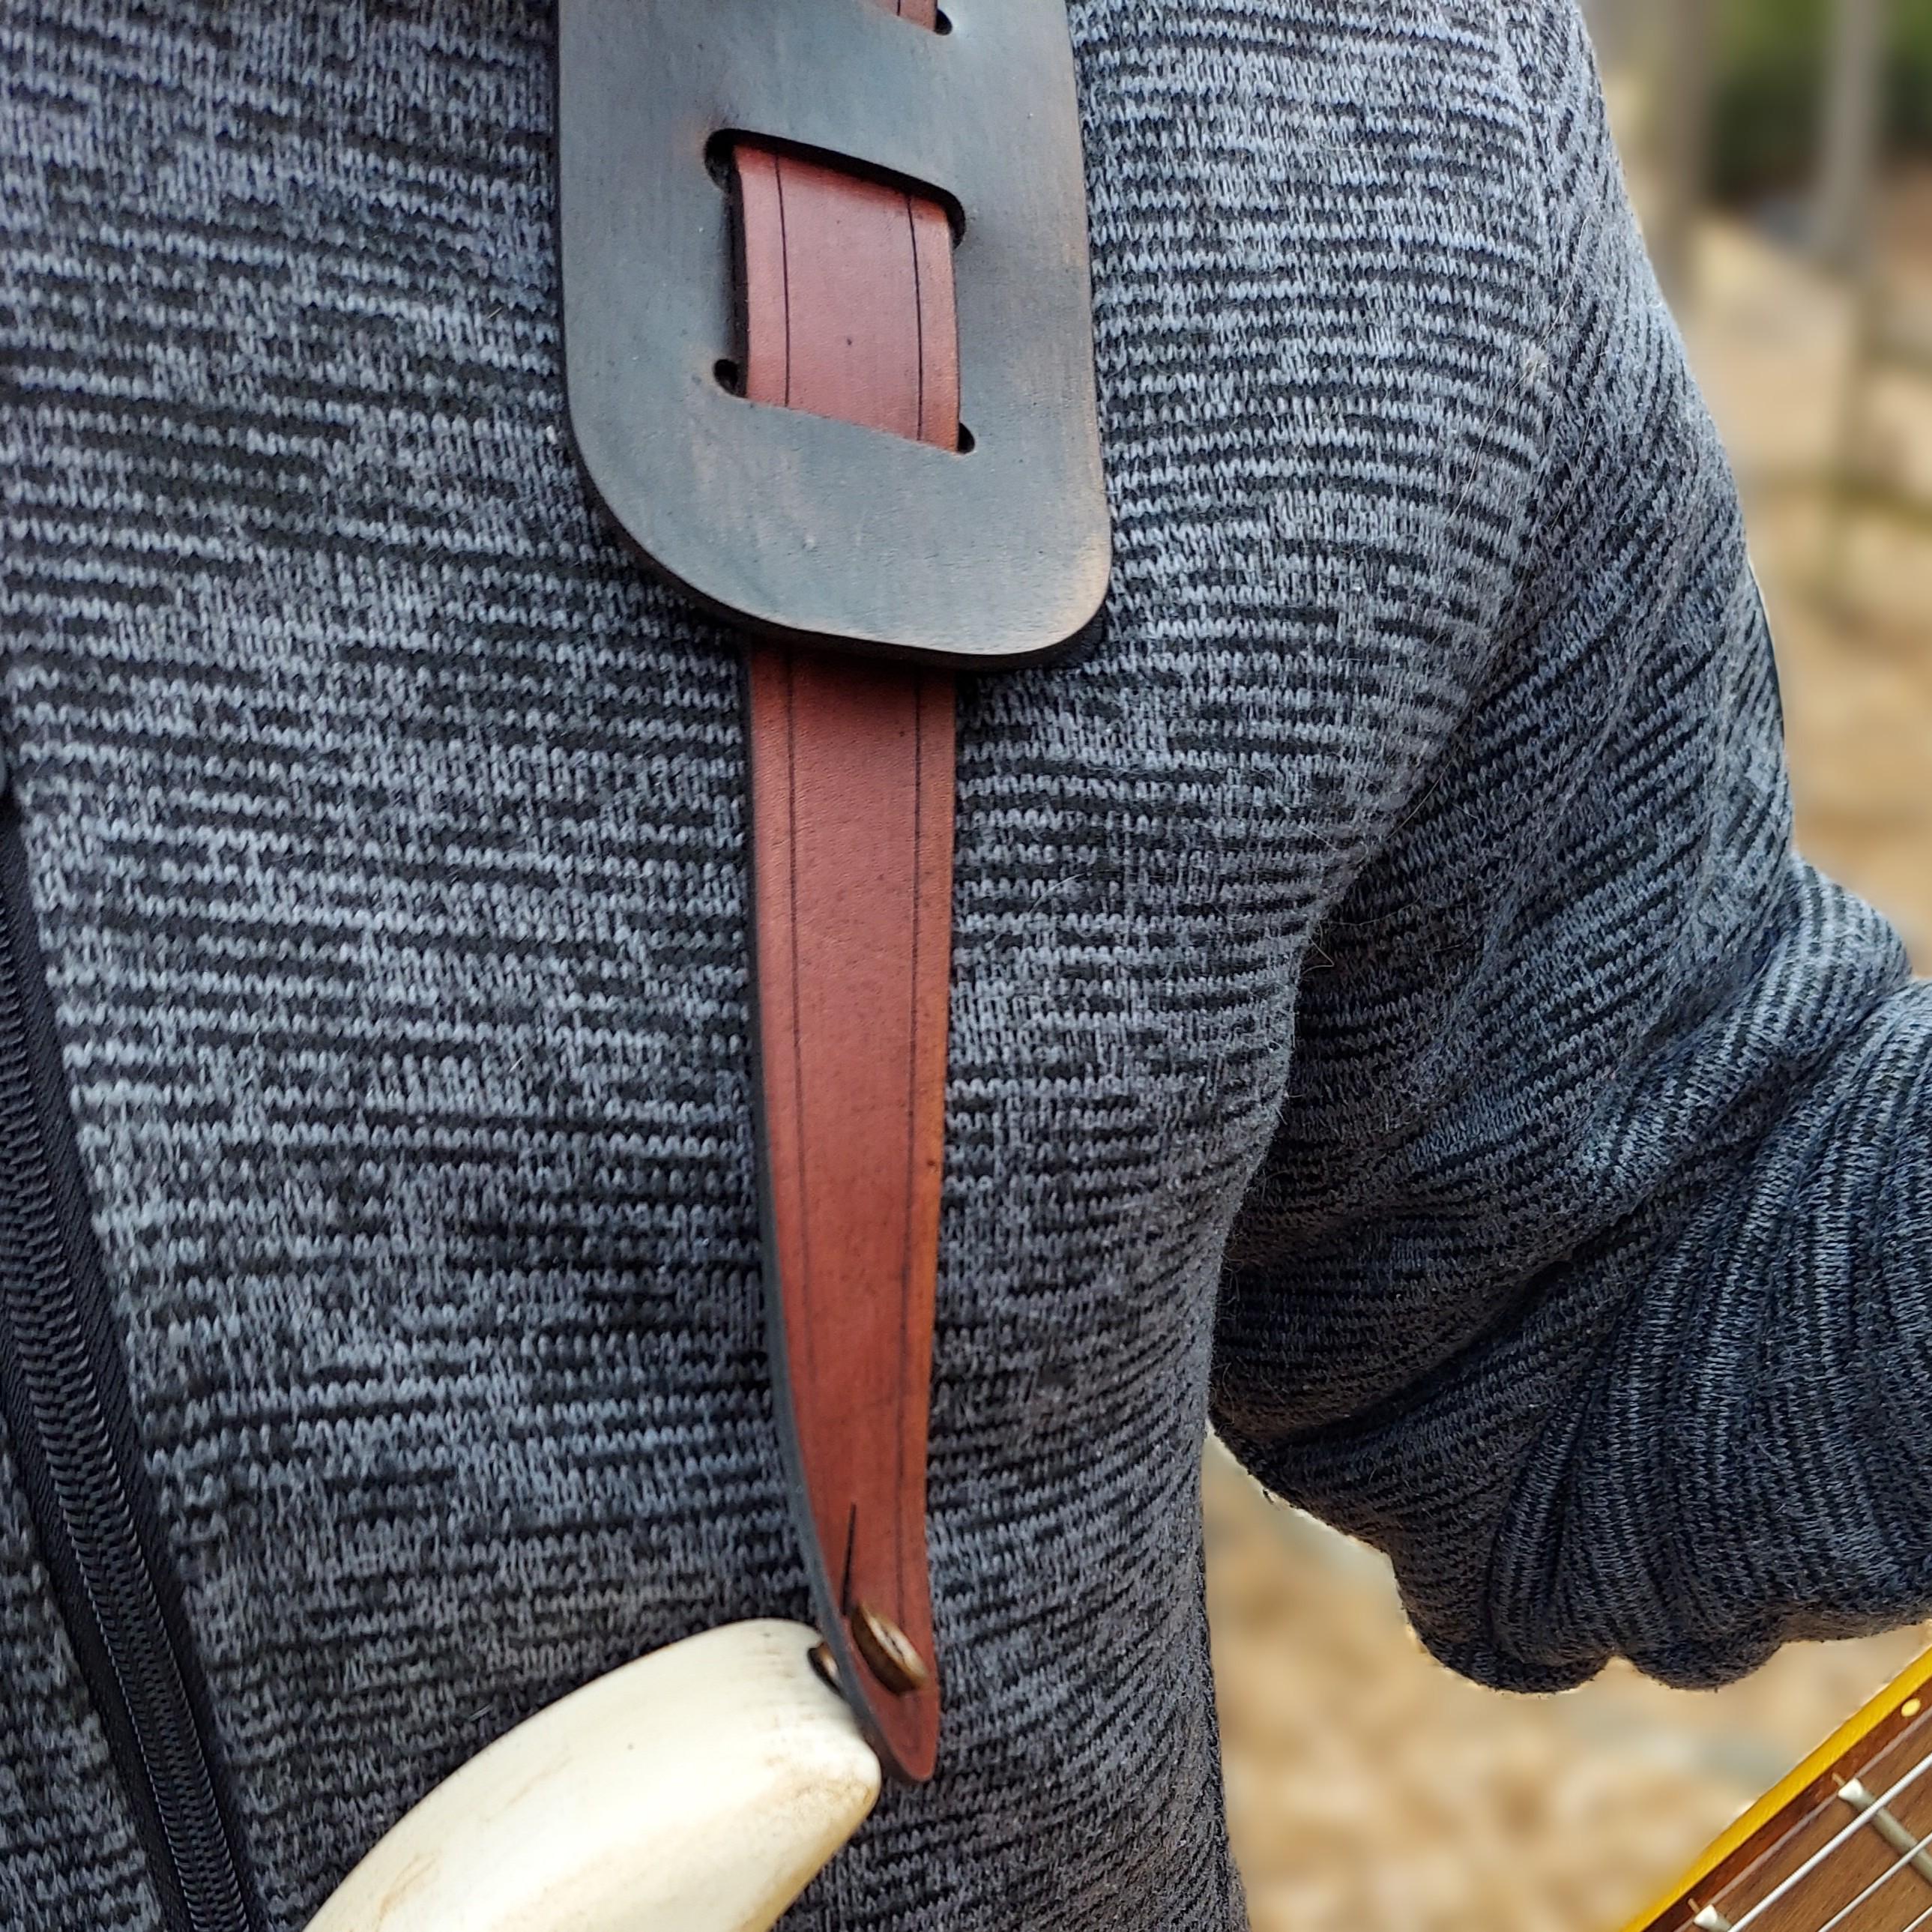
Attaching Your New Strap to Your Guitar
Each end of your strap has a hole designed to fit over a strap button—the small metal peg on your guitar’s body, typically located at the base and either at the neck heel or near the upper bout.
Because the leather is new and full grain, it may feel stiff at first. This is normal and part of the break-in process.
To attach:
1. Locate the strap button or pin on your guitar.
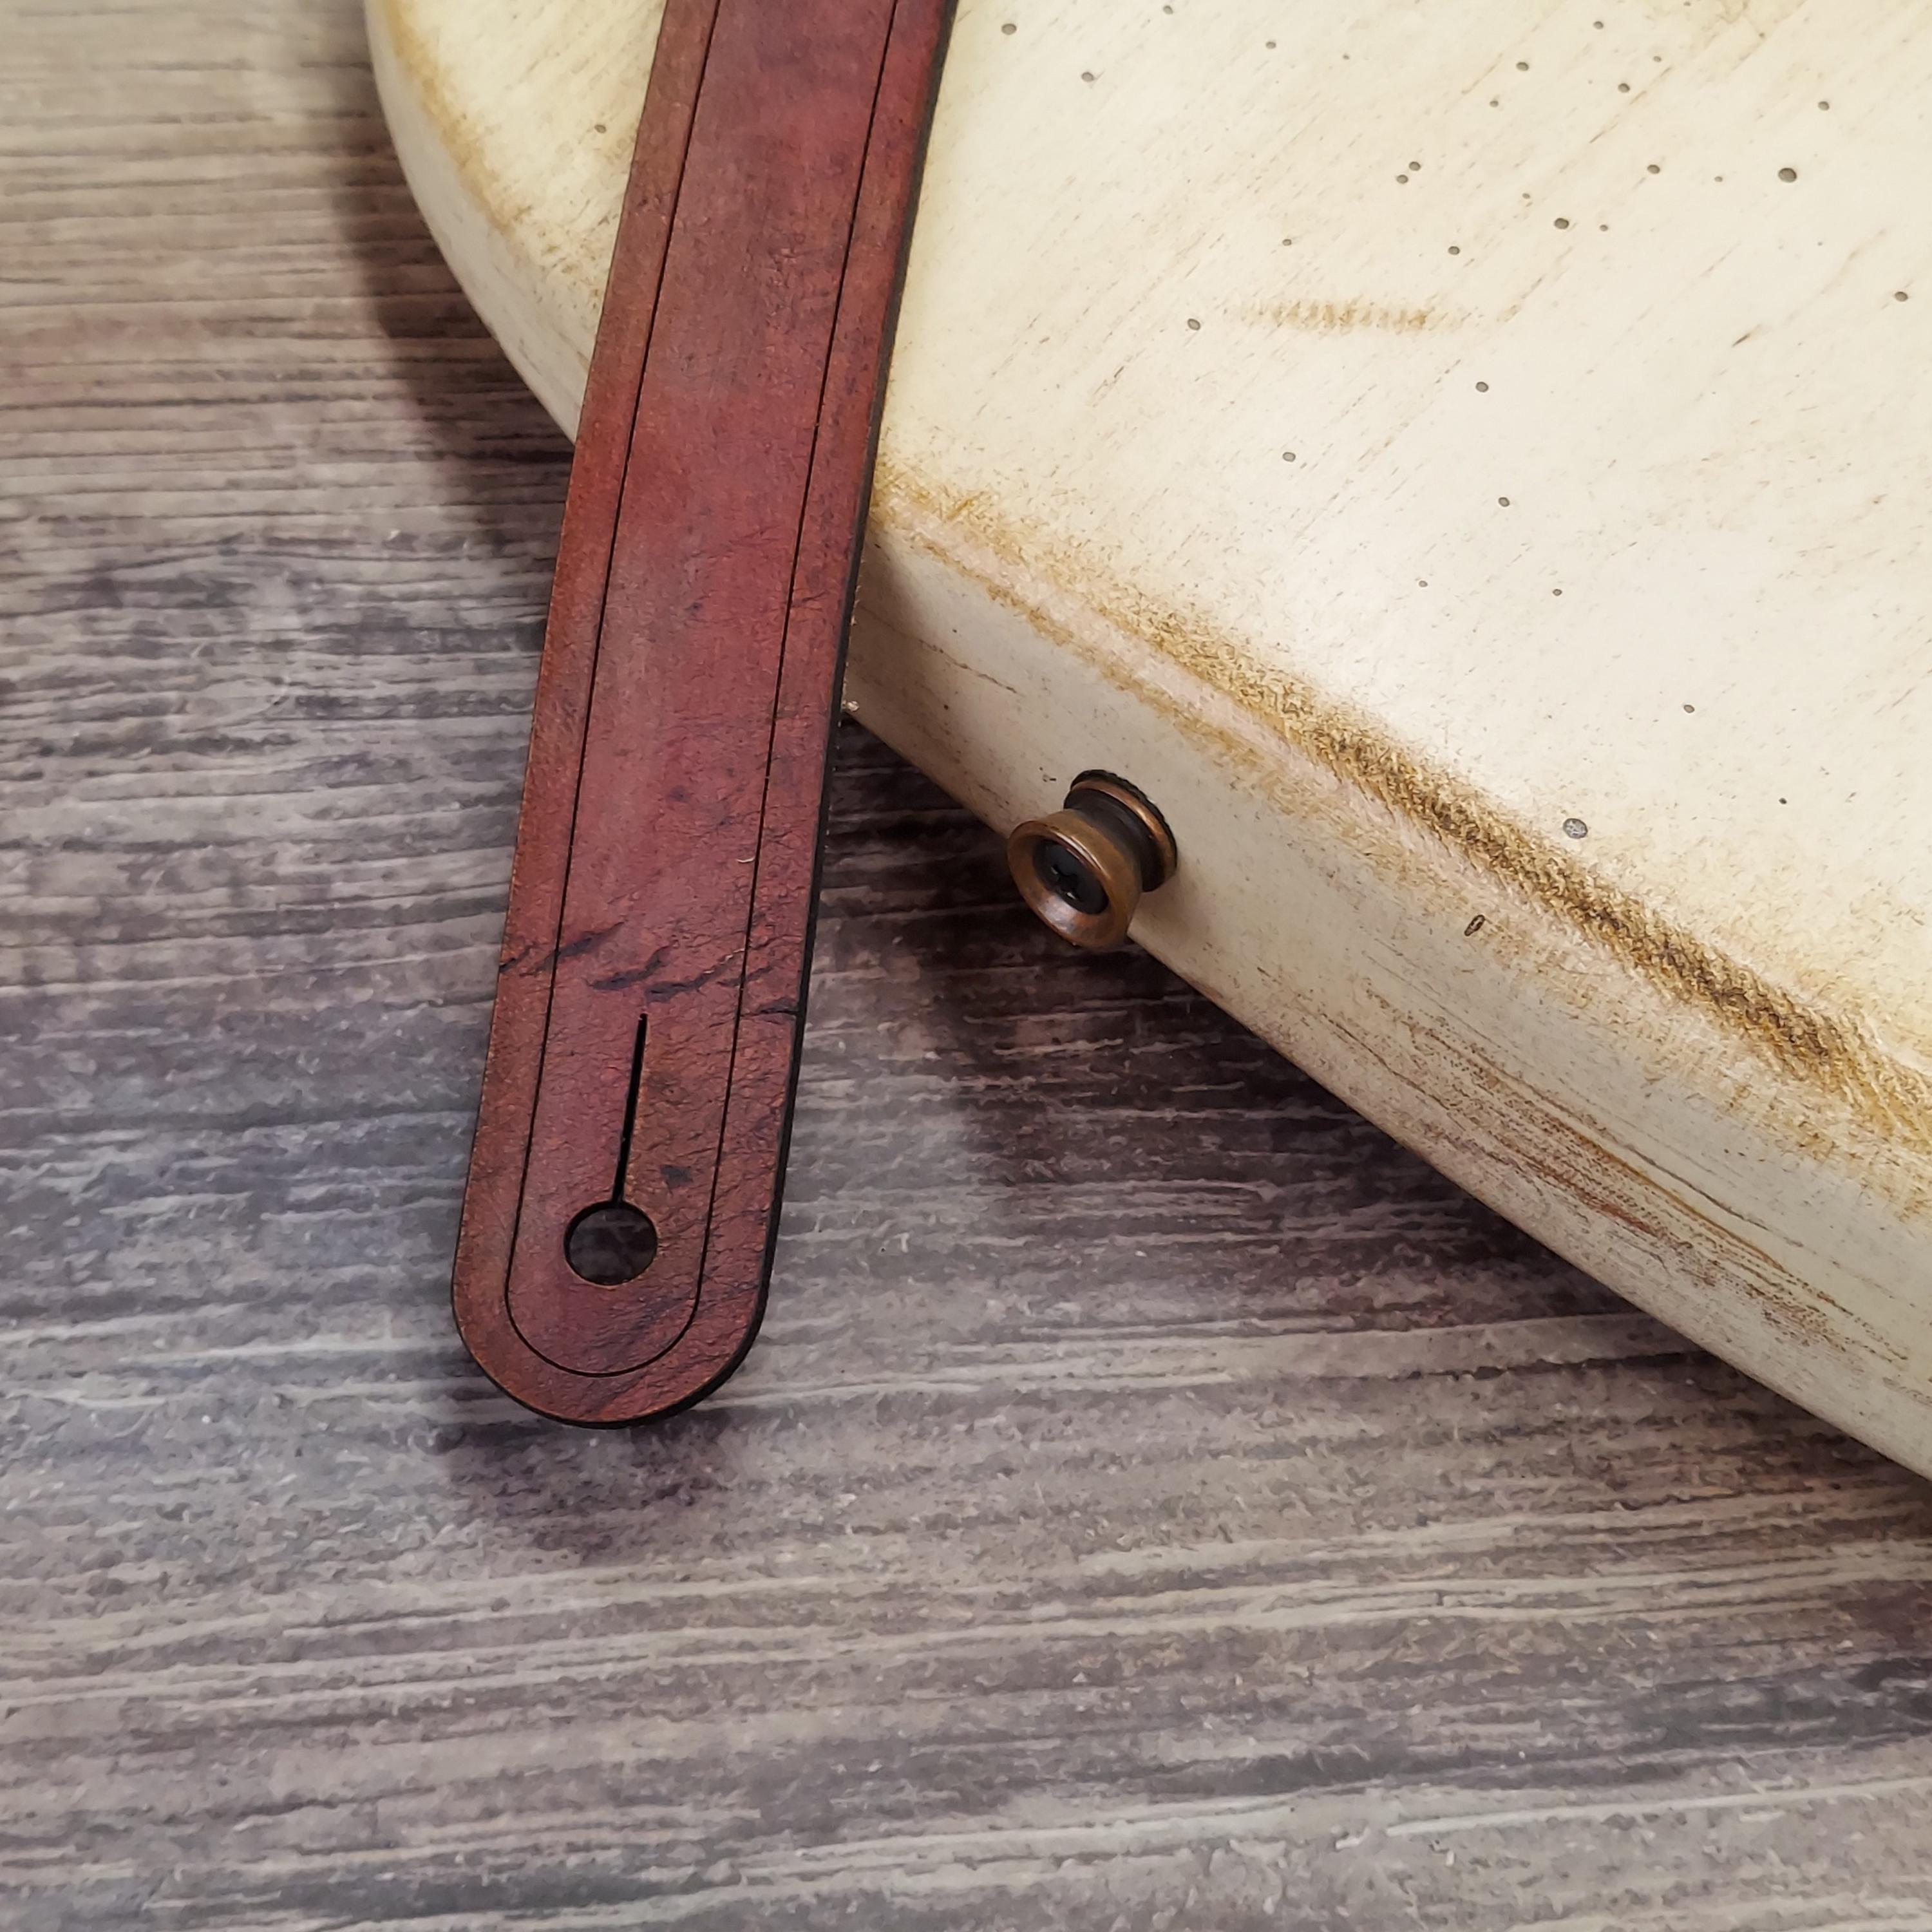
2. Align the hole in the leather with the button and work the hole over the button using your thumbs. It may take a bit of work the first time, but the leather will soften with use.
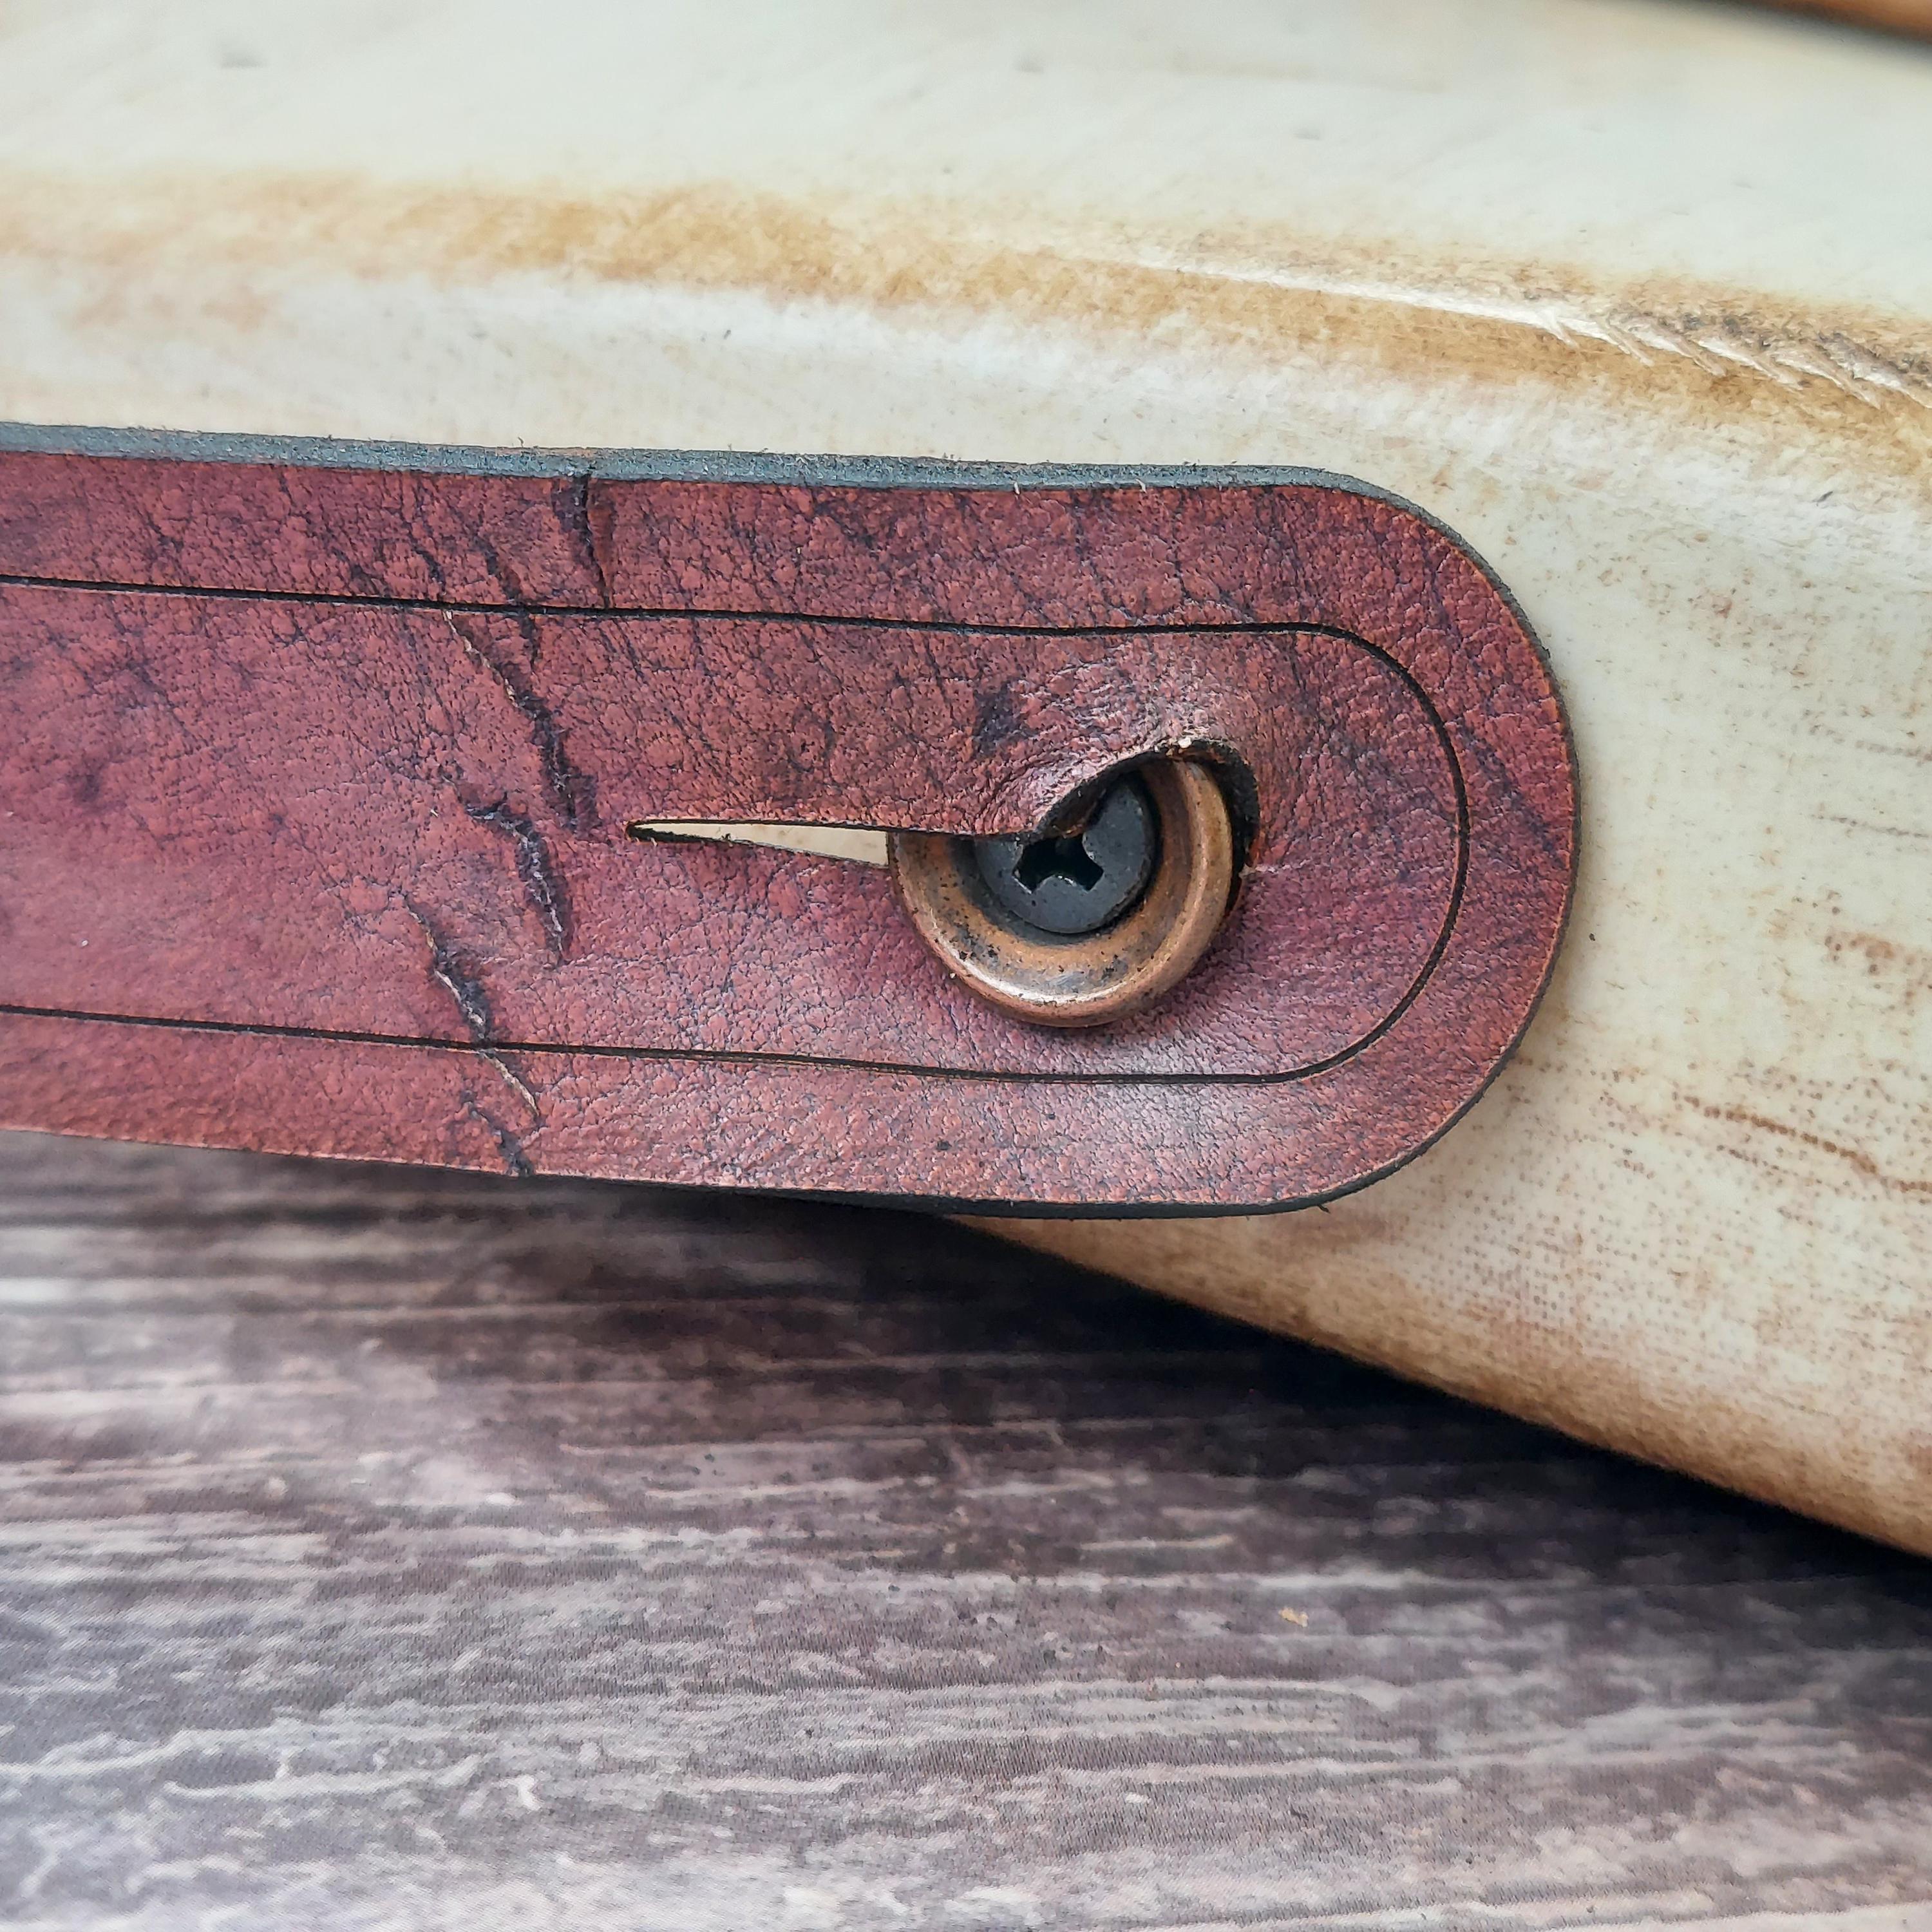
4. Once attached, gently tug to check that the strap is secure.

Tip: If the hole feels especially tight, you can soften the area slightly by gently rolling the leather between your fingers for a few seconds, or by flexing it back and forth a few times before attaching.
If Your Guitar Doesn’t Have a Second Strap Button
Some guitars only have one strap button at the base. In this case, the other end of the strap is secured to the headstock using a lace, trap lock or other device (not included with our straps). The lace wraps under the strings around the headstock.
As there's a wide variety of commercially available wraps and locks on the market, please be sure to check with your product's instructions.
To attach using a simple leather lace:
1. Thread the lace through the small hole or slot at the end of the strap.
2. Wrap the lace under the strings and around the headstock, just above the nut and below the tuners.
3. Tie a secure knot—a square knot or double knot works well—to hold the strap in place.
4. Tug gently to make sure everything is secure before playing.
As with the strap holes, the leather near the lace slot may feel stiff at first. You can flex it gently with your fingers if needed.